Letter-writing takes a new turn with this stationary that wraps right up into its own envelope.
1.
Look carefully at the picture here to see how the envelope is constructed. On both long sides of a piece of paper, measure in about the width of three fingers. Fold both sides of the paper in and crease the edges all the way down the sheet. Unfold the paper.
2.
At one end of the paper, measure down the flap about the width of three fingers. With Crayola® Scissors, cut from the edge of the paper up to the fold. At the fold, cut up to the top of the paper at about a 90 degree angle. This forms the closing flap for the envelope.
3.
With Crayola Fine Tip Markers, Erasable Colored Pencils, Metallic Colored Pencils, and/or MiniStampers, write and illustrate a message on the inside of the envelope.
4.
Fold in the sides of the envelope. Fold up the bottom of the paper until it almost touches the flap at the top. Fold over the flap. Crease all the edges.
5.
Design the outside of the envelope using symbols that hint at the contents. Write the return address and correspondent's address-friend, pen pal, relative, or famous person.
6.
When the message is finished, seal the envelope with a Crayola Washable Glue Stick.
What do family members or neighbors remember about the "olden days" or their home countries? Find out in an oral history
Which memories do you remember the best? Use Crayola® Markers to create artwork that tells a story in the tradition of
Honor women who helped to shape our world. Create a place for great leaders at history’s table.
Explore the rich visual culture of ancient Egypt! Create a captivating multimedia portrait in historic Egyptian style.
A famous section of Beijing, the capital of China, is surrounded by a moat. Imagine being in The Forbidden City, where a
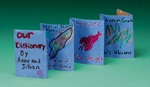
Explore Prince Edward Island with Anne of Green Gables! Draw and describe this enchanting Canadian island in an accordio
How do pets or wildlife care for their young? Discover how young animals change as they grow!