Jump into geography and geology by making a book that illustrates natural landforms! Where does the fault lie?
1.
What do you see when you look out of car, bus, train, or airplane windows? What are the biggest things that change? Is the road always flat and straight? Do you see rock walls? How about bodies of water?
2.
Imagine that you are a bird. You can see so many things flying in the sky. Pick two points on a map. They can be your hometown and the place where your relatives live -- or any other two places in the world. What land features would you see as you fly from one place to the other Would you see islands? Mountains or hills? Rivers or oceans? Inlets or an isthmus?
3.
Find maps and pictures of the landforms along the route you would travel. Make a list of the many types of landscapes you could see on your trip. Are there deserts? Glaciers? Faults? Volcanoes?
4.
On construction paper, draw a picture of each land feature with Crayola® Washable Markers. Label each page with the type of landform and where you would see it on your trip.
5.
Draw front and back covers for your land features book on construction paper. Give your book a catchy title. Include the author's name (that's you)!
6.
Place the pages of your book inside its cover. Punch two holes through the pages. Cut two pieces of yarn with Crayola Scissors. Thread yarn through the holes to bind your book.
Create a unique, stunning display of the Earth’s landforms. Showcase learning with textured materials such as sandpaper,
Take a trek through Brazil's mighty Amazon River and its basin. Which unusual creatures will you encounter in this spect
Explore and respond to the work of Ansel Adams, creating original black and white pencil landscape drawings of the Sierr
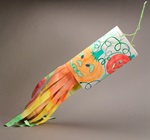
Catch indoor breezes with a colorful windsock! Whether you’re learning about Japan, weather, or aviation, Crayola® Twist
Focus on the fall harvest as you use Vincent van Gogh's techniques to create an original drawing with Crayola® Colored P
Hop from islands to mountains, from permafrost to tropical rainforests. Explore glaciers and coral reefs. Display the di
Create unique gold jewelry with nature's finest leaves. Add Crayola® Model Magic® and gold Premier Tempera for a strikin
What’s inside the crater of an active volcano? Bubbling red magma. Show molten lava flowing from a "fire mountain" that