Try this slick technique to create wild lines and reveal hidden colors! Explore the art of Albrecht Dürer and use lines and shapes to etch your favorite animal.
1.
Albrecht Dürer is widely known as the greatest artist of the Northern Renaissance largely due to the success of his etchings. Look carefully at Dürer’s print called "Rhinoceros." How does he use lines in an interesting way to create this drawing? What shapes do you see? Why do some line overlap others?
2.
Cover a sheet of white paper entirely with large areas of bright colors using Crayola Slick Stix™. Slick Stix contain pigments that may stain clothing, fabrics and other household surfaces. Wear a smock to protect clothing and cover your work surface with newspaper. Be sure to color right to the edge of the paper. With a black Slick Stix, conceal the areas of color completely.
3.
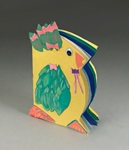
Choose an animal to etch onto your paper. Use Dürer’s "Rhinocerous" for inspiration! What kind of lines can you etch to make your animal more interesting? What shapes will create exciting patterns and textures in your drawing?
4.
Use a solid, somewhat pointy object to etch into the black layer on your paper and reveal the colors underneath. Try several objects, like a paintbrush handle, toothpick, or even a comb, to create a variety of lines and thicknesses. Fill your drawing with lots of shapes and patterns to expose the bright colors!
Explore the rich visual culture of ancient Egypt! Create a captivating multimedia portrait in historic Egyptian style.
A famous section of Beijing, the capital of China, is surrounded by a moat. Imagine being in The Forbidden City, where a
Explore Prince Edward Island with Anne of Green Gables! Draw and describe this enchanting Canadian island in an accordio
How do pets or wildlife care for their young? Discover how young animals change as they grow!
Does animal brain size match body size? Affect intelligence? Sculpt the brains of three vertebrates to compare and contr
Students go wild filling Beasty Books and their brains with fun facts and figures about their favorite creatures.
Looking for a pizzazzy book report format? Try bas-relief sculpture to add a new dimension to your next presentation!
How would you like to eat a dinner of insects in the dark?! Bats find their food with echolocation—show how with this mo