1.
Challenge children who have experience with real instruments such as tambourines, rhythm sticks, and bells.
2.
First, introduce symbols to indicate which instruments or tones to play. Children put out two different sizes of unit blocks, for example, to make a musical pattern. When you see a square block, the drums play. An arch means it’s time for the tambourines.
3.
For Musical Patterns, start with two colors/sounds, and increase the number as children become skilled in ;writing and reading; music. Small, tall metal tins are safe.
4.
On white paper, draw several small rectangles in a straight row with Crayola® Write Start® Colored Pencils. These will become your music.
5.
Cover your work area with recycled newspaper. Put on a Crayola® Art Smock.
6.
Choose two colors. Paint in your rectangles with Crayola® Washable Watercolors and Brushes. Alternate the two colors to make a pattern.
7.
On another paper, paint two big swatches of the same colors. Dry overnight.
8.
Tape the two swatches of color to two musical instruments. To make your own instruments, use metal containers. Put a little water in one and a lot of water in the other.
9.
Play the music you wrote. Gently tap the labeled instruments in the order of the colors on your paper with rectangles. (Use a wooden spoon if you are using metal containers.) Listen to the melody. Can you play slowly? Fast? Soft? Louder? Exchange music w
Explore the rich visual culture of ancient Egypt! Create a captivating multimedia portrait in historic Egyptian style.
A famous section of Beijing, the capital of China, is surrounded by a moat. Imagine being in The Forbidden City, where a
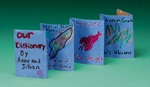
Explore Prince Edward Island with Anne of Green Gables! Draw and describe this enchanting Canadian island in an accordio