Use Crayola® Fabric Crayons to make a class quilt!
1.
A teacher or parent volunteers prepare fabric quilt squares. Use white or light-colored, prewashed 100% synthetic fabric or fabric blends with at least 60% synthetic fibers. Cut fabric into the desired quilt-square size.
2.
Students measure and cut paper squares the same size as the quilt squares, using Crayola Scissors. This paper is called a dye sheet, and will be used to transfer the design (in reverse) to the quilt fabric.
3.
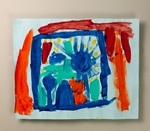
Draw designs and/or write words on the dye sheet with Crayola Fabric Crayons. Remember, letters must be written backward. To make this easier to do, draw letters with a black Crayola Broad-Line Washable Marker on the back of the dye sheet. Turn over, and fill in the backward letters. When ironed on, the words will be readable.
4.
Blend and mix fabric crayon colors. For example, magenta and orange can be blended to make red. For texture, leave crayon crumbs on the dye sheet. For sharper images, brush crumbs off.
5.
Place a pad of recycled newspaper on a safe ironing surface in a well-ventilated area. Cover the newspaper with white paper. Place a decorated dye sheet face down on the quilt fabric. Cover with a second sheet of white paper.
6.
Adults should do the ironing. Set the iron to NO steam and COTTON. Slowly press on the entire design with steady pressure. Lift the iron to move to other areas. When the design begins to show through the back of the dye sheet, check the color transfer by
7.
Decorated squares and quilts can be machine washed and ironed. Do not bleach and do not place in a dryer.
Bring nature's designs indoors with these golden leaf-printed bookmarks. For gifts, make matching picture frames, gift w
Celebrate nature with a bookmark! Collect fallen leaves to create a unique way to mark your page.
Draw and write about stormy settings, incorporating details about weather safety and how storms occur.
Soft color wash fruits adorn notes of thanks to those who help support healthy eating habits.
Gild torn-paper edges and make golden leaf imprints on this decorative frame. Display original poetry, photos, or other
Poetry, stories, warm colors and wet-on-wet watercolors leave you ready for fall.
Show what you know about how seasons affect our lives and what we do, see, and wear. Use Crayola® Washable Paints to cr